If you’re looking for a reliable and user-friendly Git repository, GitHub is my go-to choice. It’s free to use unless you need private repositories, which come with a monthly fee—but that’s totally optional. If you’re just starting out, GitHub is a great choice. You can host your source code or documents without spending a dime. Simply head over to GitHub, create an account, and start collaborating.
Creating a repository in github
Once you’ve created an account on GitHub, log in, and you’ll be greeted with your dashboard, which should look something like this:
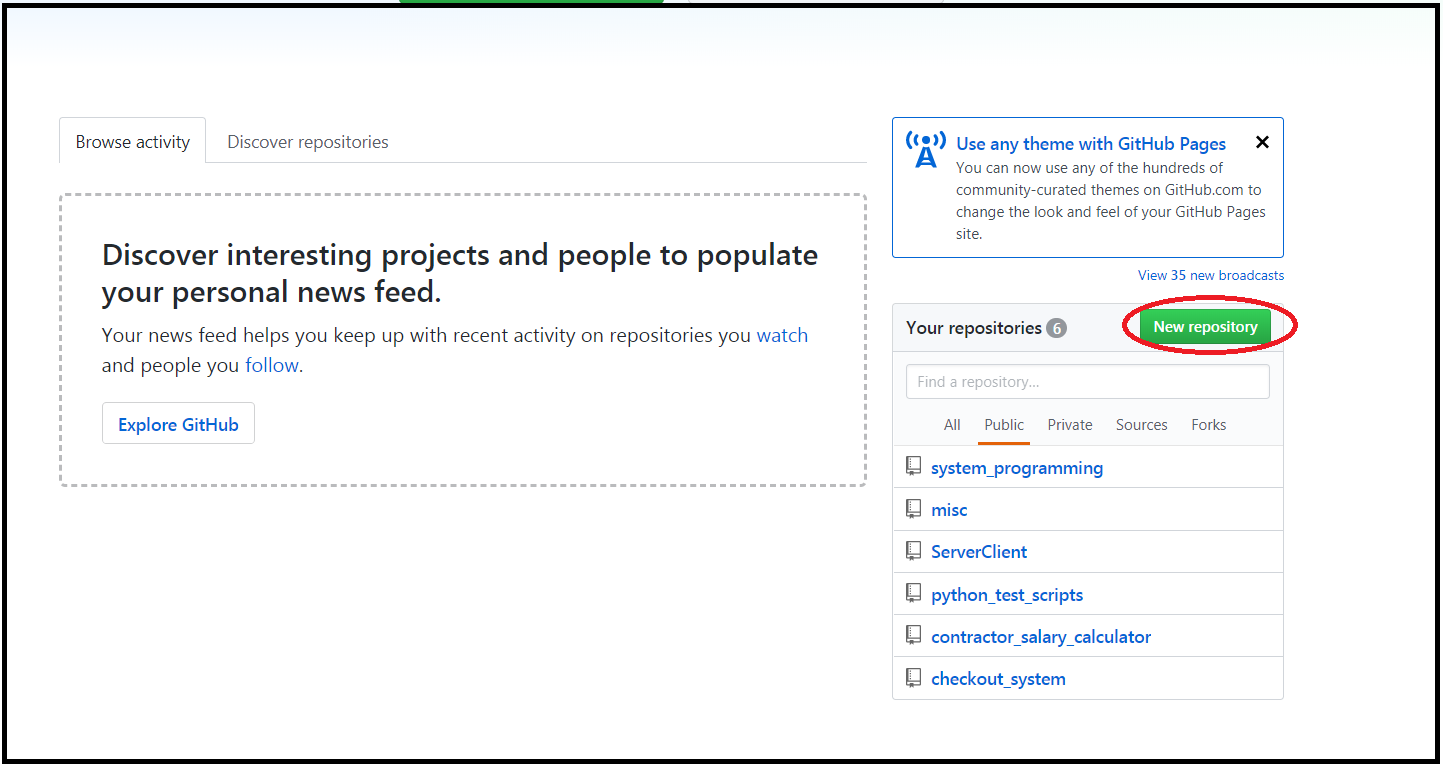
The red-circled button in the image above is your gateway to creating a new repository. Simply click on it to get started.
Once you do, GitHub will prompt you to name your repository. Let’s call ours “ExampleRepo” for this example. To keep things organized, add a short description—this will help you differentiate between repositories later on.
If you want to keep your repository private, you can select the Private option. However, for this guide, we’ll stick with a public repository.
Now, here’s a pro tip: every Git repository should have a README file. Fortunately, GitHub makes this easy by letting you initialize your repository with a blank README right from the start. Just check the “Initialize this repository with a README” option before creating the repo.
The image below highlights the key fields to pay attention to.

Now, simply click the “Create Repository” button, and just like that—your Git repository is live!
You now have a space to store, manage, and collaborate on your code or documents. From here, you can start adding files, cloning the repo to your local machine, or even inviting collaborators.
Welcome to the world of GitHub!

Cloning a GIT repository
Tortoise GIT
To work with files—whether uploading, downloading, or managing them—from a Windows machine, you’ll need a Git client. There are several options available, but in this guide, we’ll focus on TortoiseGit.
TortoiseGit is a user-friendly Git client. It integrates seamlessly with Windows Explorer. This allows you to manage your repositories with a simple right-click. You can download it from the official source:
Once installed, you’ll be able to clone repositories, commit changes, and push updates—all without needing to use the command line. Let’s get started!
Git for Windows: Setting Up Your Git Environment
TortoiseGit is a shell extension. It integrates directly into Windows Explorer. This integration makes it super easy to work with Git repositories using right-click options. But before you can use it, you need a Git executable for Windows. TortoiseGit relies on it to run Git commands in the background.
The one I use is Git for Windows, and you can grab it from here:
Cloning Your GitHub Repository
Now that you have TortoiseGit and Git for Windows installed, you’re ready to download the Git repository. You can also say “clone” the repository. It is the one you just created.
Here’s how to do it:
Open Windows Explorer and go to the folder where you want to store your Git repository.
- In my case, I have a folder called Misc, and I want to clone my ExampleRepo inside it.
Right-click on the folder (e.g., Misc) and select “Git Clone…” from the menu.
A Git Clone window will pop up, asking for the repository URL.
Get the repository URL from GitHub:
- Open your ExampleRepo on GitHub.
- Copy the URL from the address bar (it should look something like:
https://github.com/vivekbhadra/ExampleRepo).
Paste the URL into the TortoiseGit Git Clone window and hit OK.
That’s it! TortoiseGit will start downloading the repository, and once it’s done, you’ll have a local copy ready to work with.
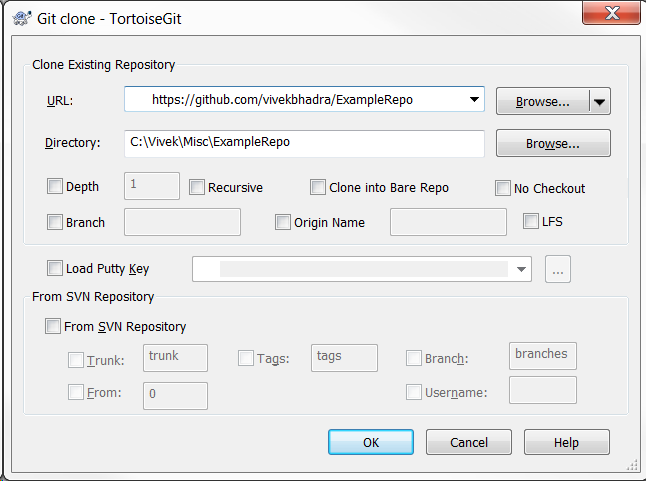
The Git Clone window will show you the folder where your repository will be cloned. If you want to change the destination, you can click on Browse and select a different folder.
Once you’re happy with the location, click on the “OK” button.
TortoiseGit will now start downloading your repository, and within a few moments, you’ll see that the cloning process is complete. You now have a local copy of your GitHub repository, ready to work with!
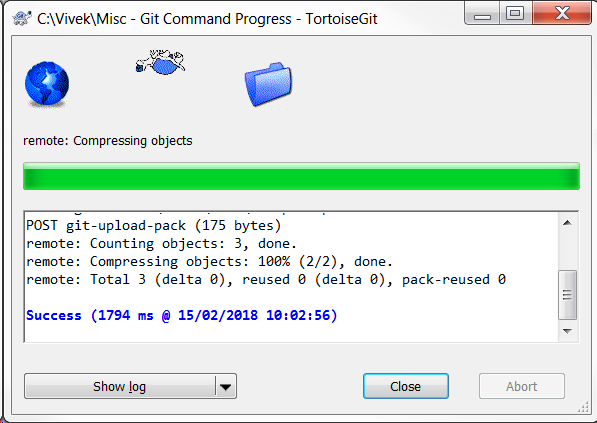
Close the Git Clone window once the process is complete.
Now, if you go back to the Misc folder, you’ll notice something new. A new folder named “ExampleRepo” has been created. You might have selected a different location for cloning. In that case, check there instead.
Open this folder, and inside, you’ll find a single file: README. This is the default README file we initialised while creating the repository. At this point, your local repository is ready for further development!
Populating the repository with new files
Adding new files locally
Let’s say you want to version control two files:
- abc.doc (a Word document)
- xyz.c (a C source file)
I’ve deliberately chosen two different file types. This emphasizes that Git doesn’t care about the type of files. It can track anything, whether it’s code, documents, images, or configuration files. That said, in real-world projects, you’d typically keep repositories organized based on the type of content they contain.
Copying Files to the Repository Folder
Now, copy abc.doc and xyz.c into your ExampleRepo folder in Windows.
At this point, if you open the ExampleRepo folder, you’ll see that it now contains:
README(the file that was initialized during repository creation)abc.docxyz.c
Now that these files are in place, let’s move on to adding them to Git’s version control.

Making Your Changes Permanent in the Local Repository
Now that we’ve added our files to the ExampleRepo folder, we need to tell Git to track these changes. This process is called committing—it saves a snapshot of your work in the local repository.
Here’s how to do it:
- Right-click on the “ExampleRepo” folder in Windows Explorer.
- Click on Git Commit → “master” in the context menu.
- This is Git’s way of saying, “I’m ready to save your changes.”
- A commit window will open, asking for a description of your changes.
- In the Message box, write a short note explaining what you’re committing.
- For example: “Added abc.doc and xyz.c as initial files.”
- Below the message box, you’ll see a list of files that Git has detected.
- Check the files you want to commit.
- If you see any unnecessary files (like Windows backup files), uncheck them.
- Click OK or Commit to finalize the process.
At this point, your files are officially part of the local repository, but they’re not on GitHub yet. That’s what we’ll do next.
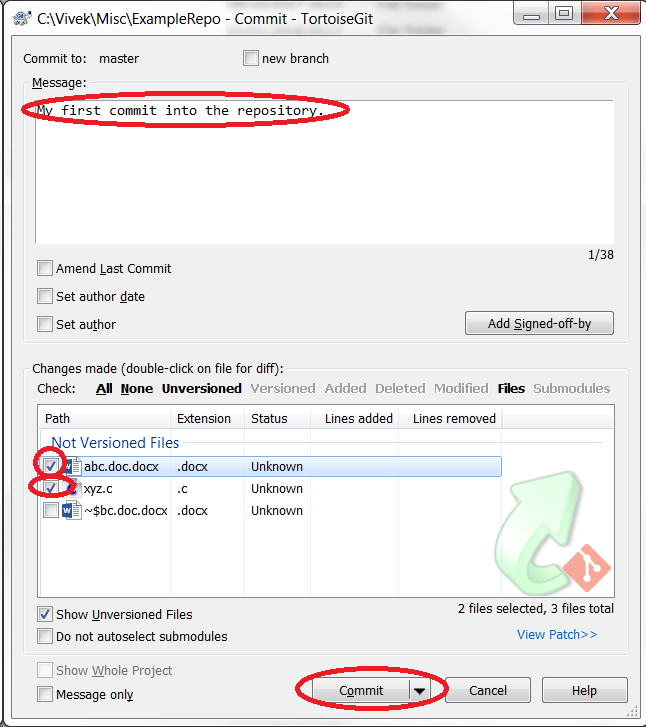
Now click on the commit button and you will something like this:
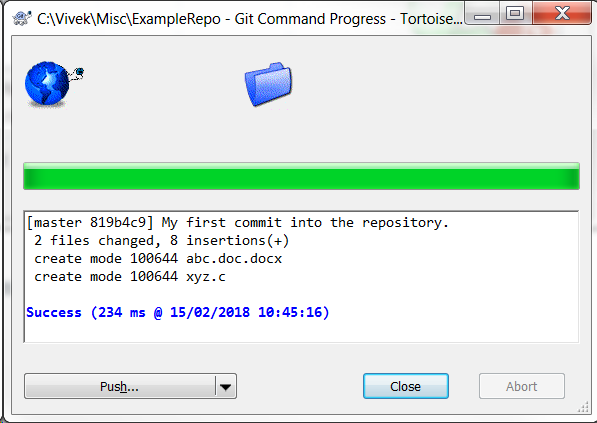
Close the window.
Pushing Your Changes to GitHub (Master Branch)
Now that your files are committed locally, the next step is to push them to your remote GitHub repository. This makes your changes available online, so they’re backed up and accessible from anywhere.
Steps to Push Your Changes to GitHub
- Right-click on the “ExampleRepo” folder” in Windows Explorer.
- Hover over TortoiseGit, then click on Push.
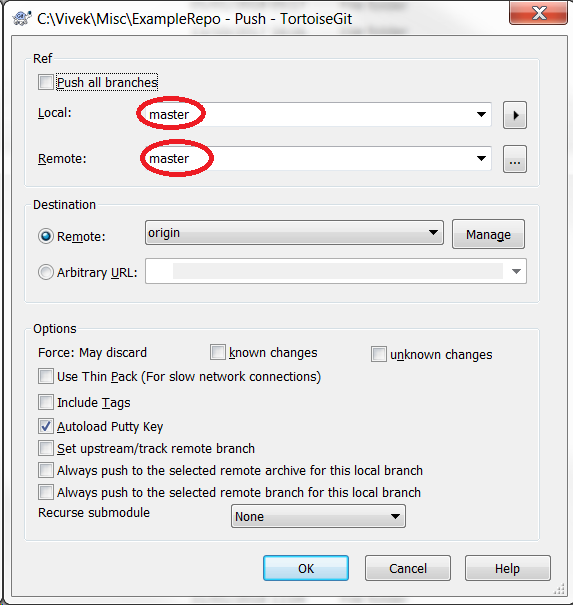
- A Push window will appear, showing details about where the files will be uploaded.
At this point, you’ll see options to specify the remote repository. You can also specify the branch, which is usually “master” or “main” by default. The image below highlights the key areas to focus on.
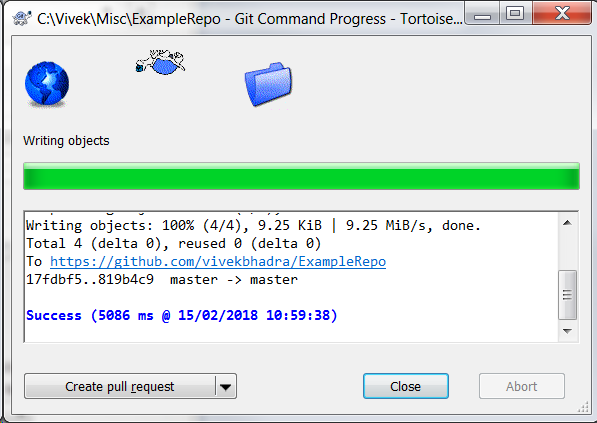
Simply leave everything as it is in the Push window and click OK.You should now see a progress window showing that Git is uploading your files to the remote repository. Once the process completes, you’ll get a confirmation message indicating that the push was successful.At this point, your changes are now live on GitHub, and you can verify them by visiting your repository online!


Leave a Reply